Grunt, a JS Command Line Tool
Grunt describes itself as:
Grunt is a task-based command line build tool for JavaScript projects.
It was released very recently and is authored by Ben "Cowboy" Alman and lives on the Github Repository. In this tutorial I'm going to be going through the basics of Grunt, how to install & use it. I will only cover basic usage today, with a follow up post planned for next week.
Please note that Grunt is currently in beta and changing fairly regularly, this tutorial was written with Grunt 0.3.9. I will link to newer versions of the tutorial when new versions of Grunt are released.
Grunt is installed as a NPM (Node Package Manager) module. If you've not got Node.js & NPM installed, you should do that before proceeding. You can install the package from the Node.js website, or if you're on a Mac & have homebrew installed you can get it that way too. You should then install NPM, which manages packages for Node. You could draw certain parallels between NPM & Ruby Gems, if you like. Please note that if you use a package install from the Node.js website, that comes with NPM already. Only install NPM if you installed from source or via a package manager like homebrew.
Once done, Grunt is installed with a simple npm install -g grunt. The -g flag installs Grunt globally, which means it will be available from anywhere in your terminal, as it's installed to the root node_modules directory. If you only want Grunt to be available when you're within a specific directory, navigate to that directory & run the above command, just without -g. Once that's done you'll get a whole load of terminal output as Grunt & its dependencies are installed. Once done you will see something like this:
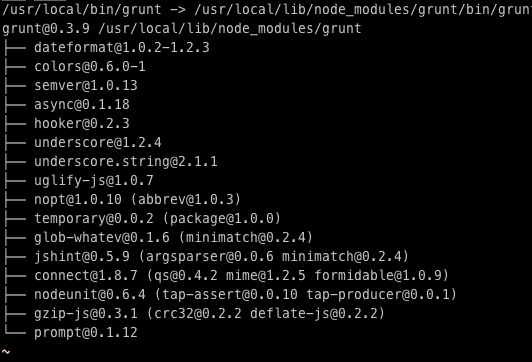
You can see here that I have installed Grunt and the list of dependencies. If you get a similar output, you're all set, so we can now set up a project.
The first step is to initialise a new project, through Grunt. There's a number of different types of projects we can initialise here as Grunt comes with some handy templates, including specific project set up for commonjs, jquery, and node. Lets create a jQuery project. Make a new directory to house your project and then enter grunt init:jquery. You'll be asked a few questions along the way. Grunt shows the current value set in brackets, and if you don't want to override it, just press enter. Here's what mine looks like:
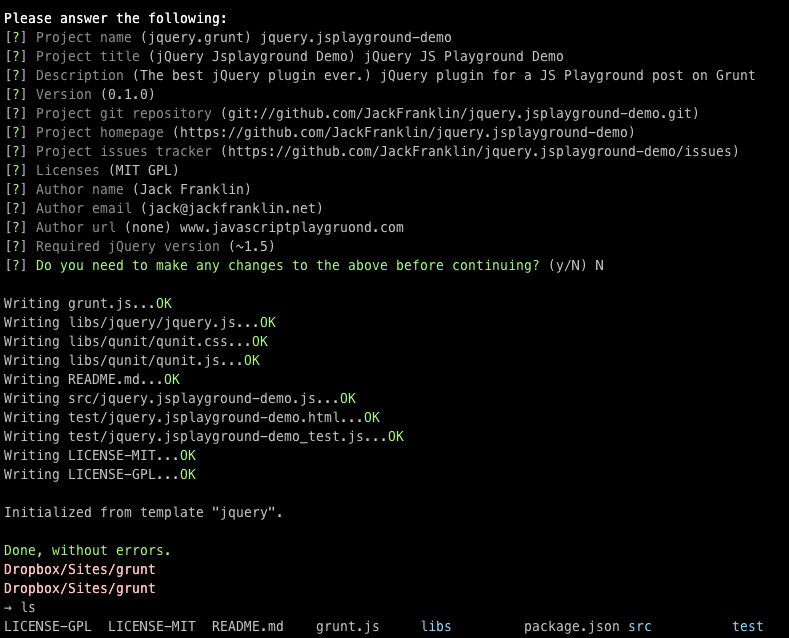
The first file we will take a look in is the grunt.js file, also known as gruntfile. Some of this is a bit overwhelming and might look a bit alien, but don't worry for now. The key bits I'd like to point out is that Grunt has added sections for qunit here, and generated the test directory for us. It's also got instructions for concatenating files, watching files & running tasks on those files automatically when it detects a change in them:
watch: { files: 'config:lint.files', tasks: 'lint qunit' }
This takes the files from the config:lint.files, which means this part of our config:
lint: { files: ['grunt.js', 'src//*.js', 'test//*.js'] }
That tells Grunt to automatically run the lint and qunit tasks (which do exactly what you'd think) whenever any of those files change. Pretty nifty! I will demonstrate this in a moment.
At the end you'll find this line:
grunt.registerTask('default', 'lint qunit concat min');
This tells grunt that if it's not specified a task when it's run, just to run lint, qunit, concat and min. Lets go to our terminal, and enter grunt.
Unfortunately for me, this didn't go to plan:
Running "lint:files" (lint) task Lint free.
Running "qunit:files" (qunit) task Testing jquery.jsplayground-demo.html Running PhantomJS...ERROR
Installing PhantomJS is fairly straight forward, instructions can be found here. PhantomJS is a headless Webkit, with a JavaScript API, which means we can run tests through it, including QUnit tests. Once you've got it installed, you should see the output look like this:
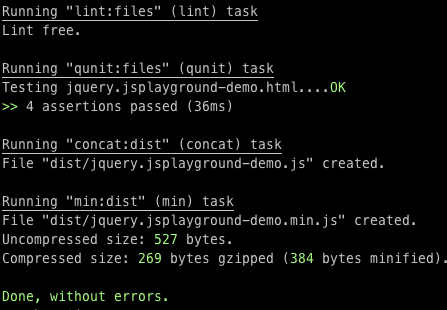
(as an aside, I will be covering PhantomJS in more depth in the very near future).
So, what this script did:
- Ran JSLint on our code to check it for problems.
- Automatically ran QUnit tests for us, without opening a browser.
- Concatenated our files into one (although in this instance there is only one)
- Minified that concatenated file into a minified JS file.
Now, I don't know about you, but I think that's pretty awesome for just one command! Say I want to run those tasks every time, I could edit grunt.js to let me do that. Find the code for watch, which looks like this:
watch: { files: 'config:lint.files', tasks: 'lint qunit' },
Now, I could add the tasks concat and min to that, but if you remember we defined the default task to do all of this, so I can make the tasks to run on watch simply default: watch: { files: 'config:lint.files', tasks: 'default' } Of course, in reality running the concat & min tasks every time you save is a bit overkill, but I just want to demonstrate what you can do. You may decide to see up new tasks, one to run as default, one to run when you release your code, one to run whilst developing, and so on.
Now, lets take a look at the JS file it initially created for us, which is in src/jquery.jsplayground-demo.js. You will see it put in the license for us, the copyright and the URL to the Github repository - all of which we set up through grunt init:jquery earlier. Now, lets change this file so we can see watch in action. Grunt gives us a few bits of code to get us started, but I'm going to delete some of it, then save the file so I can demonstrate Grunt's watching abilities. First, get the watch task running by entering in the terminal grunt watch. Then, make an edit. I'm going to enter some invalid JS, so we can see JSLint fail. In my plugin file I've typed some rubbish stuff. I save it, and then my terminal automatically updates:
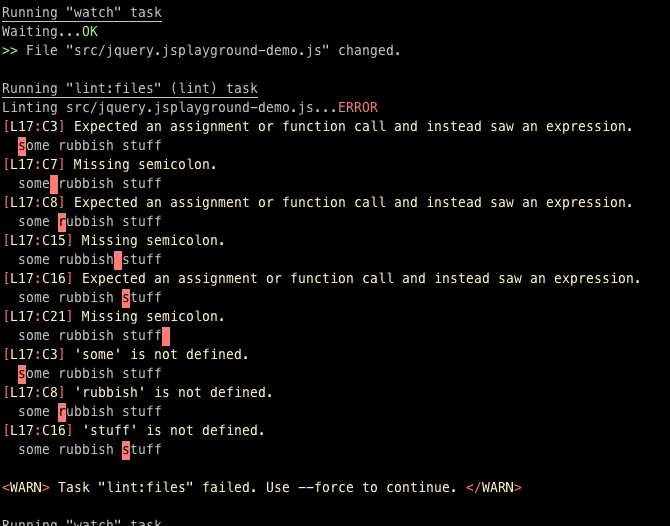
I'm going to fix that but remove all the jQuery code other than the code for $.fn.awesome. Grunt has tests written for us, so when I save this file, you'll see tests fail. They fail because we're testing code I've just removed.

I remove those tests which are not not needed, and we pass:
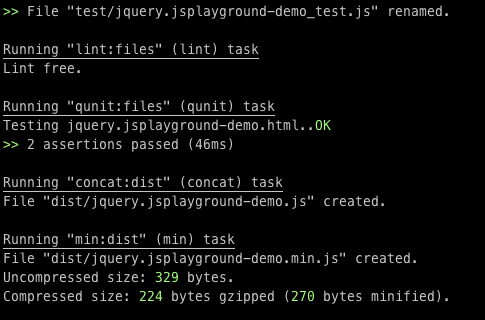 .
.
Just imagine when working on a project, being able to run grunt watch and then happily working on your code, knowing it will be tested, checked & minified every time.
I hope this brief look at Grunt has inspired you to give it a go. I personally have used it in a few projects recently and have really enjoyed it. If you have any questions, please do leave a comment & I will answer them in the next tutorial on Grunt, which I expect will be published in the next week or two. We have only just scratched the surface of what Grunt can do and in the next tutorial we shall further explore everything Grunt has to offer.